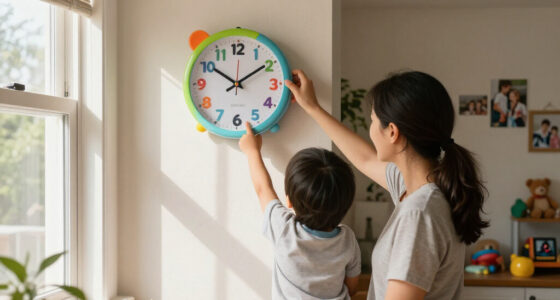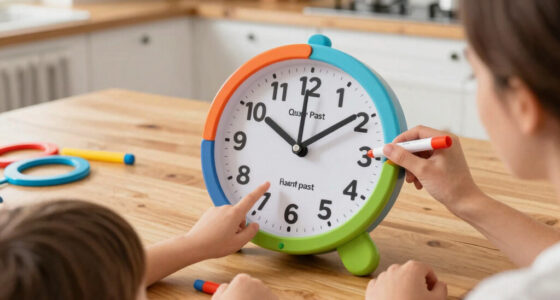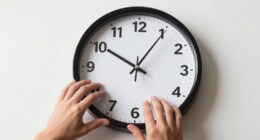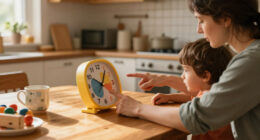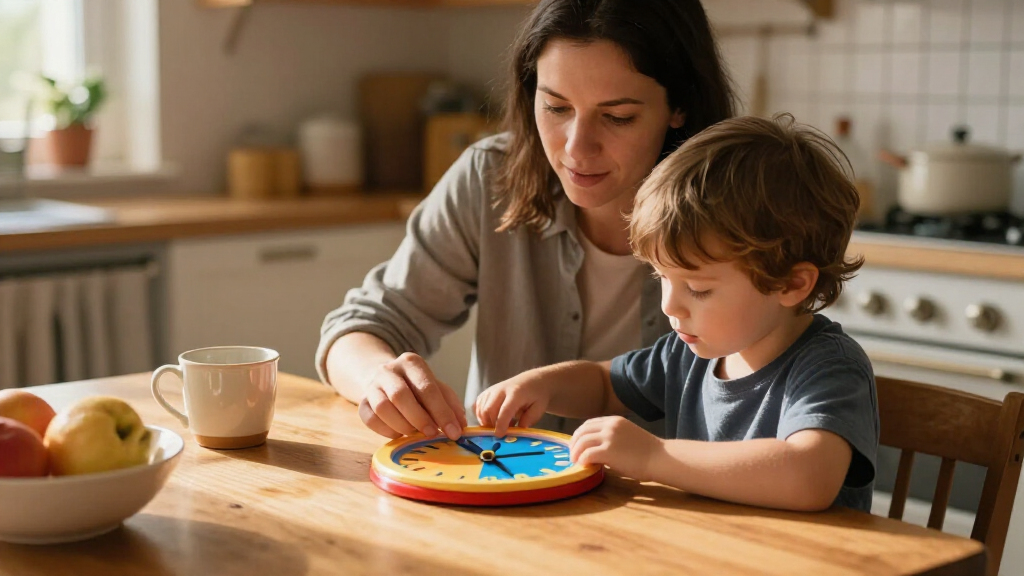
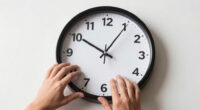
Use this guide to teach a child, usually ages 5-8, how to read an analog clock and relate it to digital time. The lessons start with the clock face and move through hours, half hours, quarter hours, and five-minute intervals. Plan on short, regular practice sessions; most children need repeated practice over several weeks. The approach is beginner-friendly for an adult teaching at home or in a classroom.

Get decor and gifts delivered free — and shop member deals
- Fast, free delivery on millions of items
- Access to Prime Big Deal Days deals on October 6–7
- Prime Video, Amazon Music and more included

Learning Resources Time Activity Set
- ✔ Includes: Teaching clock, write-and-wipe clock, 24 double-sided puzzle cards, 12 double-sided activity cards, 3 time dice, and activity guide
- ✔ Learning skills: Telling time, including hours and half-hours
- ✔ Use: Classroom or at-home practice

Oyster&Pop Kids 10-Inch Silent Analog Learning Wall Clock
- ✔ Display: Analog
- ✔ Diameter: 10 inches
- ✔ Movement: Silent sweeping, non-ticking

DHCHAPU 4-Inch Learning Clock for Kids
- ✔ Brand: DHCHAPU
- ✔ Material: Plastic
- ✔ Diameter: 3.93 inches
Difficulty: Beginner | Time: 10-15 minutes per day for 2-4 weeks
What You’ll Need
Tools & Materials:
- An analog teaching clock with movable hour and minute hands, or a large paper clock
- A digital clock or a phone clock for comparison
- Paper and pencil or a small whiteboard
- Everyday activities with known times, such as lunch or bedtime
Knowledge:
- Basic counting from 1 to 60
- The ability to recognize numerals 1 through 12
- An adult who can read whole-hour and half-hour times
Choose a clock with hands that move together correctly: when the minute hand completes a full circle, the hour hand should move to the next number. If the child is still learning to count or recognize numerals, practice those skills separately alongside short clock activities. Keep sessions brief and stop if the child becomes tired or frustrated.
Learning Resources Time Activity Set
For a child who learns by moving pieces and trying examples, this set gives us the richest mix of ways to practice. Its teaching clock and write-and-wipe clock let an adult demonstrate a time and then give the child a chance to work through it, while puzzle cards, activity cards, and dice keep practice from being limited to one format. The guide also makes it easier to start a lesson at home or use the materials with a group.Compared with the Oyster&Pop, which is designed to stay on a wall as a daily visual reference, this set is more involved and better suited to planned practice. It also offers more supporting materials than DHCHAPU’s single compact clock. Its described learning focus includes hours and half-hours, so families looking for a complete progression into finer minute reading should check whether the included activities match their next learning goal. The tradeoff is that this is a collection of teaching materials to bring out and organize, rather than one clock that remains visible in a room.
Pros:
- Includes both a teaching clock and a write-and-wipe clock
- Puzzle cards, activity cards, and dice offer varied practice
- Activity guide supports use at home or in a classroom
- Designed to teach time concepts including hours and half-hours
Cons:
- Requires more setup and storage than a single clock
- The stated learning focus is hours and half-hours, which may not cover advanced practice
Best for: Families, teachers, or homeschoolers who want several reusable materials for guided practice with analog time.
Not ideal for: Buyers who want a single wall clock for everyday reference, or children ready for a more advanced focus on reading exact minutes.
Bottom line: We rank this first for the breadth of its hands-on practice, provided buyers want a teaching set rather than a clock to leave on display.
“We rank this first for the breadth of its hands-on practice, provided buyers want a teaching set rather than a clock to leave on display.”
Oyster&Pop Kids 10-Inch Silent Analog Learning Wall Clock
When the goal is to make time visible throughout the day, Oyster&Pop offers a clear, room-friendly format. The numbered minutes give children a reference around the dial, while the color-coded, labeled hour and minute hands help distinguish what each hand means. At 10 inches across, it is intended to be read from across a room more easily than DHCHAPU’s small desktop clock.Unlike the Learning Resources set, Oyster&Pop does not provide a collection of manipulatives for structured lessons; its role is to make the clock face itself a teaching aid. The included printable activity e-book adds some guided work, but the child still learns primarily by reading the wall display. Its silent sweeping movement suits bedrooms and study spaces where ticking could distract. Buyers should plan for one AA battery and a suitable hanging spot, and should remember that a wall clock is less convenient to bring to a table for close demonstrations than either dedicated teaching clock.
Pros:
- Numbered minutes support practice beyond reading the hour
- Color-coded, labeled hands clarify hour and minute functions
- Silent sweeping movement avoids ticking sounds
- Printable activity e-book is included
Cons:
- Requires one AA battery
- Wall placement makes it less portable than a tabletop learning clock
- Offers fewer physical practice materials than the Learning Resources set
Best for: Families who want a legible analog learning reference in a child’s bedroom, classroom, or study area.
Not ideal for: Buyers seeking movable teaching hands, a portable desktop lesson tool, or a complete set of physical activities.
Bottom line: We recommend Oyster&Pop when a child benefits from a clearly labeled clock in daily view, with the understanding that it is primarily a wall reference.
“We recommend Oyster&Pop when a child benefits from a clearly labeled clock in daily view, with the understanding that it is primarily a wall reference.”
DHCHAPU 4-Inch Learning Clock for Kids
DHCHAPU is built around a simple advantage: it is small, light, and made to stand on a desk. Its color-coded geared hands connect the hour and minute indicators as a child adjusts them, while large 12- and 24-hour markings offer more information than a basic face. The stand makes it practical for a close-up demonstration at a desk, and its compact format is easy to move between learning spaces.This makes it a more portable teaching prop than Oyster&Pop, whose 10-inch face is better viewed from a distance, but it cannot replace the broader activity sequence in the Learning Resources kit. At roughly four inches across, its markings are for individual tabletop use rather than serving as a visible room clock. The listed age range is 3–8, which makes it a focused early-learning option; older children or learners seeking structured practice cards may get more from the larger set. The description also notes indoor use and battery power, so it is not a self-contained, unpowered teaching prop.
Pros:
- Built-in stand supports desktop teaching
- Geared, color-coded hands help connect hand movement with the displayed time
- Shows 12- and 24-hour markings
- Compact and lightweight for moving between desks
Cons:
- Small face is not suited to room-wide visibility
- Designed for indoor use
- Battery powered, with no battery details provided in the supplied specifications
Best for: Parents and educators who want a small, stand-mounted clock for close-up demonstrations with younger learners.
Not ideal for: Buyers who need a wall display, extensive lesson materials, or a clock face readable across a room.
Bottom line: We see DHCHAPU as a portable early-learning aid for close demonstrations, not as a substitute for a full practice kit or wall clock.
“We see DHCHAPU as a portable early-learning aid for close demonstrations, not as a substitute for a full practice kit or wall clock.”
As an Amazon Associate we earn from qualifying purchases.
Before You Start
Show the child that an analog clock has a face, numbers, and two hands. Explain that the shorter hand shows the hour and the longer hand shows the minutes. Use the same words each time. Avoid teaching every kind of time at once: first build confidence with whole hours, then add half hours and smaller intervals. A teaching clock with clearly different hands makes this distinction easier to see.
Set a relaxed pace. Let the child move the hands and make guesses before correcting them. Praise the method as well as correct answers, such as noticing which number the short hand is near. Early on, accept a correct hour even if the child cannot yet name the minutes.
Step-by-Step Instructions
Step 1: Explore the clock face
Point to the numbers 1 through 12 and ask the child to name them in order. Then trace the direction the hands travel around the clock, starting at 12 and moving toward 1. Have the child follow the path with a finger. Explain that the clock face repeats this pattern throughout the day.
Ask the child to find specific numbers, such as 3, 6, and 9. Connect them to familiar positions: 12 is at the top, 6 at the bottom, 3 on the right, and 9 on the left. Keep this first activity focused on recognizing the face, without asking the child to read a time yet.
Tip: If the child mixes up the direction, move a toy or finger around the face while saying the numbers aloud.
Check: The child can point to the numbers in order and trace the clock’s direction without turning the clock around.
Step 2: Identify the two hands
Point to the shorter hand and call it the hour hand. Point to the longer hand and call it the minute hand. Ask the child to show you each one several times. Explain that the short hand tells which hour it is, while the long hand tells how many minutes have passed within that hour.
Move each hand separately on the teaching clock so the child can see which is which. Then put both hands at 12 and say, “Both hands are at 12.” Avoid introducing minute counting during this step; the goal is to identify the hands reliably.
Tip: Use a clock with different colors or shapes for its hands. If the hands are similar, add removable colored markers near their ends.
Check: The child points to the short hand when asked for the hour hand and to the long hand when asked for the minute hand.
Step 3: Practice whole hours
Set the minute hand at 12 and move the hour hand to a number, such as 4. Say, “The long hand is at 12, so it is exactly four o’clock.” Repeat with several different numbers. Then ask the child to set the clock to times you name, such as 7 o’clock or 10 o’clock.
Switch roles after a few examples: have the child set a time and tell you what it is. Explain that the hour hand points directly to the hour number when the time is exactly on the hour. Keep the minute hand at 12 for these examples so the child can concentrate on the hour hand.
Tip: Use familiar moments, such as breakfast at 8 o’clock or a favorite program at 4 o’clock, to give the numbers meaning.
Check: The child can set and read several whole-hour times with the minute hand at 12.
Step 4: Show how the hour hand moves
Set the clock to 2 o’clock. Slowly move the minute hand around the face toward 12 while letting the hour hand move with it. Ask the child to watch the short hand creep from 2 toward 3. Explain that the hour hand does not jump straight from one number to the next; it moves gradually as the minutes pass.
Stop the minute hand at 12 and identify 3 o’clock. Repeat with another pair of hours. Then point to a time halfway between two hour numbers and ask which hour has started and which hour is coming next. Tell the child to use the number the short hand has passed, rather than the number it is approaching.
Tip: This moving-hand demonstration prevents a common error: reading the hour hand as the next number when it is close to that number.
Check: When the short hand sits between two numbers, the child names the earlier number as the current hour.
Step 5: Introduce half past
Place the minute hand at 6 and explain that it has traveled halfway around the clock. The time is half past the hour. Set the short hand between 1 and 2 and say, “It is half past 1,” or “1:30.” Point out that the hour hand is halfway toward 2 because half an hour has passed.
Practice a few examples, such as 3:30 and 8:30. Ask the child to place the minute hand at 6 first, then position the hour hand halfway between the correct hour and the next one. Use both the phrase “half past” and the digital form so the child begins connecting the two ways to say the time.
Tip: Do not expect the short hand to point directly at the hour number for a half-hour time. Its position between numbers is part of the answer.
Check: The child recognizes the minute hand at 6 as 30 minutes past and places the hour hand between the two relevant numbers.
Step 6: Connect clock numbers to minutes
Explain that each number also marks a group of five minutes for the minute hand. Starting at 12, count by fives while pointing clockwise: 5, 10, 15, 20, and continue until 60 at 12. Practice with the child until the sequence feels familiar. The number 12 marks both the start and the end of the minute cycle.
Choose a few times such as 2:10, 5:25, and 7:45. Set the short hand in its approximate position and count the minutes from 12 using the long hand. For example, when the long hand points to 4, count 5, 10, 15, 20. Say the full time aloud and compare it with the digital clock.
Tip: If counting by fives is difficult, write small minute labels beside the clock numbers or use a clock face that includes them.
Check: The child can count by fives around the clock and use the long hand’s number to identify the minutes.
Step 7: Practice quarter past and quarter to
Show that the minute hand at 3 means 15 minutes have passed, or quarter past the hour. Move it to 9 and explain that 45 minutes have passed and the next hour is 15 minutes away; this is often called quarter to the next hour. Show the matching digital forms, such as 4:15 and 4:45.
Practice placing the minute hand at 3 and 9, then ask the child to count by fives to check each reading. For quarter to, name both the digital time and the spoken phrase, such as “5:45” and “quarter to 6.” This helps the child see why the hour hand is closer to 6 while the current hour is still 5.
Tip: Some families or classrooms use “quarter of” instead of “quarter to.” Follow the wording the child hears most often, while keeping the digital time clear.
Check: The child can tell that the minute hand at 3 marks 15 minutes and at 9 marks 45 minutes, and can identify the correct current hour.
Step 8: Read mixed times and practice in daily life
Mix whole-hour, half-hour, quarter-hour, and five-minute examples. Let the child read each analog time, then write or say its digital form. Next, reverse the task: give a digital time and ask the child to set the teaching clock. Include times where the hour hand is between numbers so the child practices reading the current hour correctly.
During the day, point out a real clock at a few predictable moments, such as before school, at lunch, and before bedtime. Ask questions that invite the child to explain the reading: “Where is the long hand?” and “Which hour number has the short hand passed?” Keep these checks brief and friendly rather than turning every clock sighting into a quiz.
Tip: Add smaller minute intervals only when the child reads the five-minute marks comfortably. If the child is ready, point out the small tick marks between numbers as individual minutes.
Check: The child can read a variety of times, set the teaching clock from a digital time, and explain how the two hands support the answer.
Common Mistakes to Avoid
- Reading the hour hand as the number it is approaching. — Ask which number the short hand has already passed. For a time such as 3:50, the current hour is still 3, even though the short hand is close to 4.
- Counting the minute hand’s number as the number of minutes. — Practice counting by fives from 12. Remind the child that pointing to 4 means 20 minutes, not 4 minutes.
- Moving the hour hand directly from one number to the next during a half hour. — Move both hands together on the teaching clock so the child sees the short hand travel gradually between hour numbers.
- Introducing too many types of times in one session. — Practice whole hours first, then add one new pattern at a time. End with a few examples the child can already read confidently.
Troubleshooting
Problem: The child mixes up the hour hand and the minute hand.
Solution:
Pause time-reading practice and return to identifying the hands. Use a clock with contrasting hands, point to the shorter hand while saying “hour,” and have the child repeat the match. Resume reading whole hours once the child can identify both hands consistently.
Problem: The child can count by fives but loses track while looking at the clock.
Solution:
Start counting from 12 each time and move a finger along the numbers as you count. Add visible minute labels if needed. Practice just one or two positions per session before mixing them with other times.
Problem: The child reads the short hand correctly but struggles to name the time aloud.
Solution:
Ask for the answer in two parts: first name the hour, then count the minutes. Accept the digital form before asking for phrases such as “quarter past.” Repeating both forms side by side can make the connection clearer.
Problem: The teaching clock’s hands do not move together or stay in place.
Solution:
Check whether the hands are loose or installed incorrectly. Use a different teaching clock, or draw a large clock face and attach hands with a paper fastener. Confirm that the minute hand can move through a full circle and that the hour hand advances gradually.
What Success Looks Like
The child can identify the hour and minute hands, read whole-hour and half-hour times, count minutes in five-minute groups, and read common quarter-hour times. The child can also set an analog teaching clock from a digital time and explain how the position of each hand supports the answer. Reading every minute precisely is a later skill; progress is clear when the child can read the patterns practiced without relying on guesses.
Next Steps
Keep a teaching clock somewhere the child can reach and invite a short reading practice during one or two daily routines. Once five-minute times feel comfortable, introduce individual minute marks and compare analog readings with a digital clock. Revisit whole hours and half hours if the child becomes unsure. Use a clock-reading workbook or classroom activities for extra practice if the child wants more challenges. If the child has persistent difficulty recognizing numerals, counting, or distinguishing the hands despite regular, calm practice, talk with the child’s teacher about suitable support.
Frequently Asked Questions
At what age can a child learn to read an analog clock?
Many children begin learning around ages 5-8, but readiness varies. A child benefits from recognizing numbers 1 through 12 and counting by fives. Start with the skills the child already has and build from there.
Should I teach an analog clock or a digital clock first?
Use both. The analog clock shows how minutes pass and how the hour hand moves; the digital clock makes the written time easy to compare. Begin with the analog face and introduce the matching digital form as each pattern is learned.
How long should a clock lesson last?
Try 10-15 minutes, then stop while the child is still engaged. A few short sessions each week or brief daily practice usually work better than one long lesson.
Why does the hour hand sit between numbers?
The hour hand moves gradually as the minutes pass. When it is between 2 and 3, for example, the time is after 2 and before 3. The number it has passed tells you the current hour.
When should I teach times such as 7:23?
Wait until the child reads whole hours, half hours, quarter hours, and five-minute marks with confidence. Then explain that the small ticks between the numbered marks represent single minutes.
Fall Picks
fall essentials
As an affiliate, we earn on qualifying purchases.