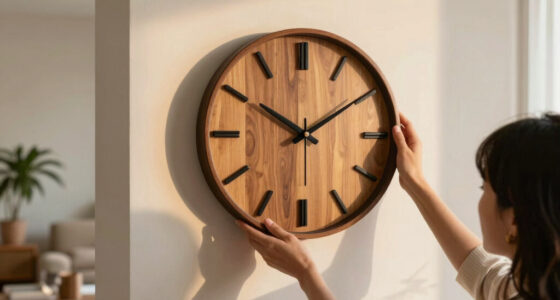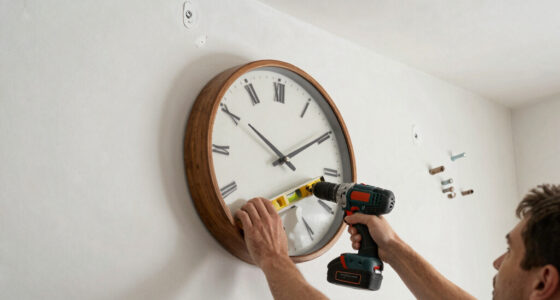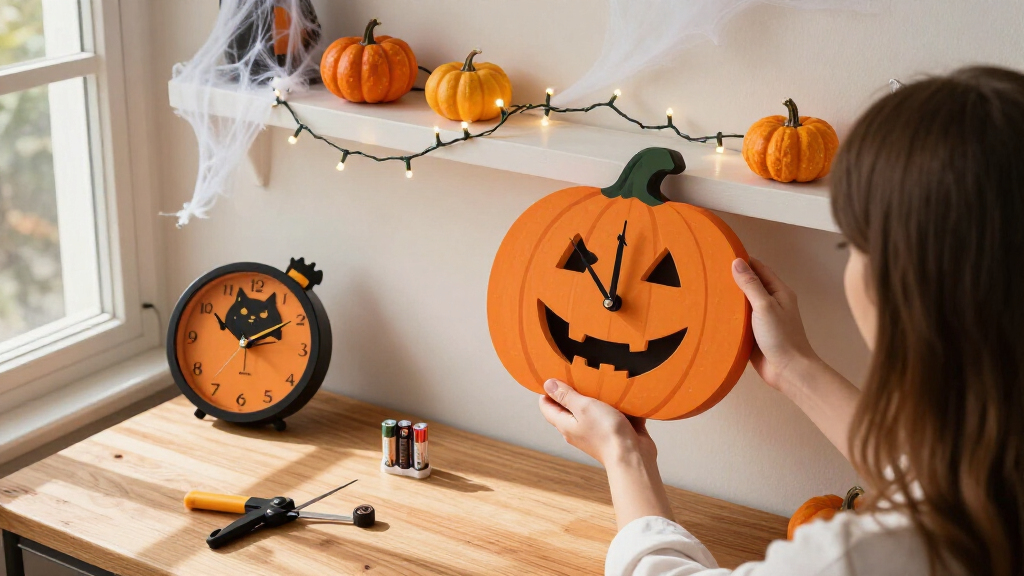

This guide shows you how to build a fun Halloween wall clock from scratch using a basic quartz clock movement kit and inexpensive craft supplies. The finished product is a fully functional clock you can hang on a wall, with a hand-decorated face featuring whatever Halloween theme you choose: pumpkins, ghosts, bats, a haunted house, or a candy motif. This project is aimed at beginners. No woodworking or electrical skill is required because the clock mechanism is a pre-assembled battery-powered unit you simply attach to a decorated base. Expect about two to three hours of hands-on work, plus overnight drying time for paint and glue. The result is a seasonal decoration that keeps accurate time and can be updated or re-themed in future years by swapping the clock face.

Get decor and gifts delivered free with Prime
- Fast, free delivery on millions of items
- Prime Video, Amazon Music and more included
- Member-only deals all year

Maxspace Halloween Wall Clock – 12 Inch Cute Ghost Silent Non-Ticking Decorative Round Clock
- ✔ Diameter: 12 inches
- ✔ Display: Analog
- ✔ Movement: Silent, non-ticking sweep

Mark Feldstein Peanuts Great Pumpkin Halloween Cuckoo Clock, 17-Inch
- ✔ Approximate dimensions: 17 x 8.75 x 4.75 inches
- ✔ Display: Analog
- ✔ Features: Hourly chime, spooky sound effects, light sensor

Halloween Gothic Castle Silent Wooden Wall Clock, 10-Inch
- ✔ Diameter: 10 inches
- ✔ Display: Listed as digital; description identifies a quartz clock
- ✔ Movement: Silent, non-ticking quartz
Difficulty: Beginner | Time: 2-3 hours plus overnight drying time
What You’ll Need
Tools & Materials:
- Quartz clock movement kit (movement, hands, and mounting hardware, 16mm shaft length or shorter for thin bases)
- Round or square wooden base, 8 to 12 inches across (craft plaque, MDF circle, or an old thrift-store clock you strip down)
- AA battery
- Acrylic paint in Halloween colors (black, orange, white, purple) plus brushes
- Pencil and ruler
- Craft knife or scissors
- Hot glue gun and glue sticks, plus craft glue or wood glue
- Painters tape
- Printed or hand-drawn clock face template (optional)
- Decorations: mini pumpkins, plastic spiders, ribbon, googly eyes, cardstock for cutouts
- Drill with a 3/8-inch bit (only if your base does not already have a center hole)
- Picture hanging hook or command strip for the wall
Knowledge:
- Basic craft skills: painting, gluing, cutting paper or cardstock
- Ability to mark and find the center of a circle using a ruler
- How to insert a battery and set hands on a standard wall clock
Check the shaft length on your clock movement kit before buying or preparing the base. The shaft must pass through the base thickness plus the paper face and still leave enough thread for the mounting nut. For a base up to 1/4 inch thick, a standard 16mm shaft works. If you reuse an old clock, keep its original movement if it still runs, and remove only the old face and hands.
Maxspace Halloween Wall Clock – 12 Inch Cute Ghost Silent Non-Ticking Decorative Round Clock
The Maxspace ghost clock balances Halloween character with everyday practicality better than the other two picks. A ghost holding a “Trick or Treat” sign, plus pumpkins, bats, and webs, gives it an unmistakably festive look without the darker tone of the gothic castle design. Its bold, high-contrast numerals also make it the clearest fit for someone who wants to glance at the time from across a room.Its silent sweeping movement makes this the most flexible choice for bedrooms, nurseries, and study spaces. Compared with the Peanuts clock, it skips the hourly sounds and extra batteries; compared with the castle clock, its cheerful art and stated readability make it easier to recommend for shared family spaces. The tradeoff is seasonal: the Halloween artwork may feel out of place once the decorations come down. We also need to supply the AA battery ourselves.At 12 inches across, it has a noticeable presence on the wall without reaching the Peanuts clock’s larger, deeper profile. The simple wall slot and battery-powered design keep placement straightforward. Choose it when we want a quiet, readable Halloween accent with broad appeal, and skip it if we want a year-round design or animated character display.
Pros:
- Silent sweeping movement suits bedrooms and study spaces.
- Bold, high-contrast numerals are designed for easy reading at a distance.
- Friendly ghost and pumpkin artwork feels playful rather than eerie.
- Simple wall slot and one-battery operation make placement straightforward.
Cons:
- Requires one AA battery, which is not included.
- Halloween-specific artwork may have limited appeal outside the season.
Best for: Families or light sleepers looking for a readable, silent Halloween clock for a bedroom, nursery, study, or living room.
Not ideal for: Shoppers who want decor that works year-round, a larger novelty display, or sound and movement as part of the clock’s appeal.
Bottom line: We recommend the Maxspace as the strongest all-around pick for a quiet, cheerful, easy-to-read Halloween wall clock.
“We recommend the Maxspace as the strongest all-around pick for a quiet, cheerful, easy-to-read Halloween wall clock.”
Mark Feldstein Peanuts Great Pumpkin Halloween Cuckoo Clock, 17-Inch
If the point of our Halloween clock is to make guests smile, the Peanuts Great Pumpkin clock has the lineup’s most theatrical concept: Snoopy pops out on the hour amid spooky sound effects. Officially licensed Peanuts artwork gives it character recognition that the original ghost and castle designs do not offer. This is the pick for a seasonal display that feels like an event rather than a quiet background detail.That novelty comes with a real limitation. Unlike the silent Maxspace and castle clocks, this model makes sounds, so it is better suited to a living room, entryway, or dedicated Halloween display than a bedroom or study. A light sensor silences the sounds in darkness, which can help at night, but it does not make the clock a silent option during the day. For shoppers who want playful animation without needing an open wall, the removable pendulum and tabletop-or-wall placement offer more display flexibility than either competitor.Its approximate 17-by-8.75-by-4.75-inch dimensions make it a deeper, more substantial display than the 12-inch Maxspace or 10-inch castle clock. It also takes two C batteries and one AA battery, all excluded. We should choose it for Peanuts charm and hourly spectacle, not for simple, unobtrusive timekeeping.
Pros:
- Snoopy pops out with spooky sound effects on the hour.
- Official Peanuts artwork offers familiar character appeal.
- Light sensor silences sounds in darkness.
- Removable pendulum supports tabletop or wall display.
Cons:
- Hourly sound effects may be distracting in quiet rooms.
- Requires two C batteries and one AA battery, none included.
- Its depth and larger overall dimensions need more display space than the other picks.
Best for: Peanuts fans and Halloween hosts who want an animated, sound-making centerpiece that can sit on a table or hang on a wall.
Not ideal for: Light sleepers, study areas, sound-sensitive households, or anyone who wants a simple silent clock with minimal battery needs.
Bottom line: We’d choose the Peanuts clock when a playful hourly show matters more than quiet operation or compact wall placement.
“We’d choose the Peanuts clock when a playful hourly show matters more than quiet operation or compact wall placement.”
Halloween Gothic Castle Silent Wooden Wall Clock, 10-Inch
The gothic castle clock is the most restrained choice in function and the most atmospheric in style. Its castle, twisted trees, spider web, and orange moon create a darker Halloween scene than the Maxspace ghost’s family-friendly illustration. At 10 inches, it is also the smallest listed wall clock here, which can help when we want a seasonal accent without giving it a dominant spot on the wall.Like the Maxspace, it uses a silent, non-ticking quartz movement, so it makes more sense for a quiet room than the sound-producing Peanuts model. The key distinction between those two silent options is mood and scale: Maxspace provides a larger dial with explicitly high-contrast numerals, while the castle clock offers a compact wooden frame and gothic artwork. The supplied details do not describe its numeral size or legibility, so we have less reason to favor it when quick reading is the priority.This is the option for a buyer whose decor leans haunted house, gothic, or spooky rather than cute. It runs on one AA battery, not included, and is listed for indoor wall mounting. One spec calls the display digital, while the description presents a quartz wall clock; because of that mismatch, we should confirm the display format in the product listing before buying if analog versus digital matters to us. Its appeal is the compact, dark seasonal look, with less versatility than the larger ghost clock.
Pros:
- Distinctive castle, twisted-tree, spider-web, and orange-moon artwork.
- Silent non-ticking movement suits quiet indoor spaces.
- At 10 inches, it has a smaller footprint than the other listed clocks.
- Battery-powered wall mounting allows flexible placement.
Cons:
- Requires one AA battery, which is not included.
- Provided details conflict on whether the display is digital or analog.
- Numeral size and readability are not specified.
Best for: Decorators who prefer gothic Halloween imagery and want a compact, silent wall clock for an indoor display.
Not ideal for: Buyers who prioritize clearly specified numeral readability, a cheerful family-friendly illustration, or sound and character movement.
Bottom line: We’d pick the castle clock for a compact gothic accent, while choosing Maxspace when easy reading and broader family appeal matter more.
“We’d pick the castle clock for a compact gothic accent, while choosing Maxspace when easy reading and broader family appeal matter more.”
As an Amazon Associate we earn from qualifying purchases.
Before You Start
Work in a ventilated area and cover your surface with newspaper or a craft mat. Paint and hot glue can damage furniture. If children are helping, an adult should handle the hot glue gun, craft knife, and drill. Before you begin, decide on your design theme and sketch it roughly on paper. A simple rule of design: the clock numbers or markers must be clearly readable at a glance, so keep decorations away from where the hands sweep. Lay out your decorations on the unpainted base first, without gluing, to confirm spacing before anything becomes permanent.
Step-by-Step Instructions
Step 1: Find and mark the center of the base
Lay the base flat. Measure across the widest point with a ruler to find the exact center, and mark it with a pencil. For a round base, measure the diameter in two or three directions; where the lines cross is the center. Draw a light pencil line through the center both horizontally and vertically so you have reference lines for positioning numbers later.
Tip: Accuracy here matters more than anywhere else in the project. An off-center hole makes the clock look crooked no matter how good the decorations are.
Check: The vertical and horizontal pencil lines cross precisely at the middle of the base, and measuring from that point to any edge gives the same distance on all sides.
Step 2: Drill or verify the center hole
If your base has no hole, drill a 3/8-inch hole straight through the center mark. Place a scrap board underneath so the drill does not splinter the exit side. If you are reusing an old clock case, confirm the existing hole is clear of old glue or debris by pushing a pencil through it.
Tip: Drill slowly and steadily. Pushing too fast cracks thin MDF and craft plaques.
Check: The movement shaft from your kit slides through the hole from the back with a small amount of clearance, and the movement sits flush against the back of the base.
Step 3: Paint the background
Apply two thin coats of acrylic paint to the front, edges, and back of the base, letting each coat dry for 30 to 60 minutes. Black or deep purple makes bright decorations pop; orange suits a pumpkin theme. Lightly sand between coats with fine sandpaper if you want a smooth finish.
Tip: Two thin coats always look better than one thick coat, which dries slowly and shows brush marks.
Check: The surface is fully covered with no bare wood showing, and the paint is dry to the touch without tackiness.
Step 4: Add the hour markers and clock face design
Using your pencil cross lines as a guide, position the numbers 12, 3, 6, and 9 first, then fill in the remaining numbers or markers evenly between them. You can paint numbers, glue on printed cardstock numbers, or use themed markers such as tiny bats for hours and a spider at 12. Make the 12 position visually distinct so the clock is easy to read.
Tip: Keep numbers and markers at least one inch from the center hole so the hands have clearance to sweep freely.
Check: Standing three feet away, you can identify each hour position at a glance, and the 12 is clearly distinguishable from the 6.
Step 5: Attach the decorations
Glue your Halloween decorations to the face using a hot glue gun for lightweight items like paper cutouts, ribbon, and plastic spiders, and craft glue or wood glue for heavier pieces like mini pumpkins. Press each item firmly for ten seconds. Keep all decorations outside the sweep radius of the hands, which is the length of your minute hand measured from the center hole.
Tip: Hold the minute hand against the face and slowly rotate it in a full circle before gluing anything. If it touches a decoration, move that decoration outward.
Check: Nothing on the face extends into the circle the hands will travel, and every decoration holds firmly when you gently tilt the base.
Step 6: Let everything dry fully
Set the base flat in a dust-free spot and leave it overnight. Hot glue sets in minutes, but craft glue, wood glue, and any painted details need extended time to reach full strength before the clock is handled and hung.
Tip: Resist the urge to assemble the movement early. Pressing on the face while glue underneath is still soft shifts decorations and can smear paint.
Check: After overnight drying, decorations do not move when lightly touched and paint shows no fingerprints or pressure marks.
Step 7: Install the clock movement and hands
From the back of the base, slide the movement shaft through the center hole. Place the rubber or metal washer and threading nut over the shaft on the front and hand-tighten it snug against the face. Then, following your kit’s instructions, press the hour hand onto the shaft first, then the minute hand, then the second hand if included, and secure them with the small cap nut. Insert the AA battery.
Tip: Hands press on flat and square. If a hand sits at an angle or wobbles, remove it and press it on again rather than forcing it further.
Check: The movement hangs tight against the back with no wobble, all hands point at 12 when set to 12:00, and the second hand is ticking visibly.
Step 8: Test the clock before hanging
Set the correct time using the dial on the back of the movement, then lay the clock flat or prop it upright on a table for at least one hour. Watch that the hands rotate a full cycle without catching on each other, on decorations, or on the numbers.
Tip: If a hand snags, bend it very slightly upward near the center to add clearance, and re-test.
Check: After one hour, the clock is still ticking, the time matches a reference clock, and no hand touched anything during its rotation.
Step 9: Hang the clock on the wall
Attach a picture hanger to the back of the base with hot glue or screws, or use a heavy-duty command strip rated for the clock’s weight. Hang it at eye level in your chosen spot, using a level to check it sits straight.
Check: The clock hangs level, does not tilt, and the ticking is audible when you stand close. Step back and confirm the whole face reads clearly from across the room.
Common Mistakes to Avoid
- Drilling the center hole off-center, making the whole clock look lopsided. — Always find the center by measuring the diameter in at least two directions and marking where the lines cross before drilling. Double-check the mark before the bit touches wood.
- Placing decorations where the hands sweep, causing the clock to stop. — Measure the minute hand length from the center hole and keep everything outside that radius. Do a full slow rotation test with the minute hand before gluing.
- Using a clock movement with a shaft too short for the base thickness, so the nut cannot tighten. — Measure your base thickness before buying the kit and choose a shaft at least 6mm longer than that thickness to account for the face material.
- Assembling the movement before paint and glue have fully cured, smearing the design. — Schedule the build across two days: decorate on day one, assemble on day two after everything has dried overnight.
Troubleshooting
Problem: The clock does not tick after the battery is inserted.
Solution: Check the battery is inserted with the correct polarity and is fresh. Confirm the hands are not pressed on too tightly against each other, which stalls the movement. Remove the second hand and test again; if it runs, remount the second hand with a small gap.
Problem: A hand catches on a number or decoration as it rotates.
Solution: Identify the exact contact point by rotating the hand slowly. Either bend the hand up slightly near its base for clearance, or carefully pry off the offending decoration with a craft knife and re-glue it further from center.
Problem: The movement spins freely in the hole or the nut will not tighten.
Solution: The hole is too large or the shaft too short. Fill the gap with a washer, or glue a small square of thick cardboard to the back of the base and re-drill a snug hole through both layers.
Problem: The clock runs but loses time over several days.
Solution: Replace the battery first, as weak batteries cause slow ticking. If it still loses time, the movement was likely strained during hand installation; swap in a replacement movement, which costs only a few dollars and reuses your existing hands and face.
What Success Looks Like
Your project is complete when the clock hangs level on the wall, keeps accurate time against a reference clock for at least 24 hours, and the hands complete full rotations without snagging on decorations or numbers. Visually, the hour markers should be readable from across the room, the 12 position should stand out, all decorations should be firmly attached with nothing wobbling, and the theme should read clearly as Halloween from a distance. Give the clock a gentle nudge test: a properly built clock stays solid on the wall with no rattling from the movement or loose trim.
Next Steps
After Halloween, remove the battery to extend its life if you store the clock. Wrap the clock in bubble wrap or tissue and store it flat in a box to protect the hands, which are the most fragile part. Next year, you can re-theme the same base: carefully peel off the old face design and decorations, repaint, and attach a new face while keeping the same movement. If you enjoyed the build, try a second clock in a different size, add glow-in-the-dark paint to the numbers for a spooky effect, or make smaller versions as party favors or classroom gifts.
Frequently Asked Questions
Can I convert a cheap store-bought clock into a Halloween clock instead of building a base?
Yes, and it is faster. Remove the battery, pry off the hands gently, unscrew the mounting nut, and pull the movement out from behind. Paint or decoupage a new Halloween design over the existing face, then reinstall the movement and hands in the same order you removed them.
What size base works best for a first clock?
A 10 to 12 inch round base is ideal. It is large enough to fit readable numbers and decorations, but small enough that standard clock hands from a basic kit reach the markers properly. Very large bases need longer hands, which usually must be bought separately.
How do I make the numbers visible in the dark for a spooky effect?
Paint the numbers or markers with glow-in-the-dark acrylic paint over your base color, applying two to three coats. Charge the paint under a bright lamp for 15 minutes before guests arrive; it will glow visibly for a few hours in a dim room.
My kit came with a hook on the movement. Do I still need a separate wall hanger?
On a lightweight base under one pound, the movement’s built-in hook may be enough if you hang it on a screw or nail. For anything heavier, or if the clock hangs over a walking path, add a proper picture hanger or command strip to the base so it cannot fall.
Can kids do this project?
Children can paint the base, arrange decorations, and help position numbers. An adult should handle the drill, craft knife, and hot glue gun, and should install the movement and hands, which require careful alignment.
Halloween Picks
halloween
As an affiliate, we earn on qualifying purchases.