
TL;DR
A DIY word clock build kit combines LED matrices, microcontrollers, and accessories, requiring basic soldering and programming skills. Recent advances include better connectivity and customization options, making it a rewarding project for hobbyists and design enthusiasts alike.
Imagine a clock that spells out the time in words—no hands, no numbers, just illuminated phrases that change with every minute. Building such a clock yourself isn’t just a fun challenge; it’s an opportunity to blend electronics, design, and a dash of coding into one sleek project.
Whether you’re a seasoned maker or a curious beginner, understanding what a build kit involves helps you gauge the effort, skills, and creativity needed. Let’s explore what’s inside these kits, recent innovations, and practical tips to bring your own word clock to life.
A DIY word clock kit includes a display panel, microcontroller, power supply, and wiring—think of it as assembling the bones of your new clock.
Most kits require only basic soldering and wiring skills, making this a beginner-friendly project with a rewarding learning curve.
Recent innovations like Wi-Fi control and addressable RGB LEDs make these clocks more customizable and fun to operate remotely.
Design flexibility is a major perk—custom layouts, colors, and features allow you to craft a truly personal timepiece.
Budget varies—simple kits start around $20, while advanced, feature-rich sets can go over $100.
What’s Inside a DIY Word Clock Kit: The Core Components You Need
At the heart of every DIY word clock kit is a combination of electronic components designed to create a visually stunning and functional timepiece. You’ll typically find a LED matrix or word panel, which displays the words, accompanied by a microcontroller — often an Arduino or ESP32 — that controls the display.
The power supply keeps everything running smoothly, usually a 5V adapter. Wiring and connectors link these parts, making the assembly more straightforward. Some kits include a frame or enclosure for aesthetics, while others leave this up to your creativity. Optional accessories like buttons, Wi-Fi modules, or remote controls can add features like voice commands or app control.

MiOYOOW 4-Digit Digital Clock Kits with PCB, DIY Alarm Clock Soldering Project Kit for Learning Electronics Soldering Practice with English Instructions
⏰【Great School Science Project】: The DIY Clock Kits are used to installed to a 4-Digit Digital Electronic Clock….
As an affiliate, we earn on qualifying purchases.
As an affiliate, we earn on qualifying purchases.
How Much Skill Do You Need to Build a Word Clock?
Building a DIY word clock with a kit generally requires only basic soldering and wiring skills. You should be comfortable connecting wires, soldering small components, and following instructions. Some familiarity with programming, especially in the Arduino IDE, makes customizing the clock easier, but many kits are designed for beginners.
For example, a first-timer assembling a simple kit might spend a few hours soldering and wiring, then another hour uploading code. More complex setups with Wi-Fi or custom layouts might take longer but are manageable with online tutorials and community forums. Think of it as piecing together a complicated but rewarding puzzle.

Dekala PixelRise Smart Alarm Clock for Bedroom,Pixel Art LED Dot Matrix Display, Weather Temperature Animation, Loud Dual Alarm for Heavy Sleeper, Sleep White Noise, WiFi Weather & DST Time Sync, App
⏰ Double Alarm Digital Clock & Big Snooze for Easy Wake-Up – Stay punctual with the dual alarm feature…
As an affiliate, we earn on qualifying purchases.
As an affiliate, we earn on qualifying purchases.
The Time and Effort Involved in Assembling Your DIY Word Clock
Expect assembly times to range from a quick afternoon to a full day, depending on complexity. For a straightforward kit, you might spend 2-4 hours soldering, wiring, and testing. More advanced setups with extra features could stretch to 6-8 hours or more.
Programming the clock involves uploading code to the microcontroller and possibly tweaking display settings. If you enjoy tinkering, this step becomes part of the fun. For example, you might customize the display to show different languages or add a night mode—small tweaks that personalize your creation.
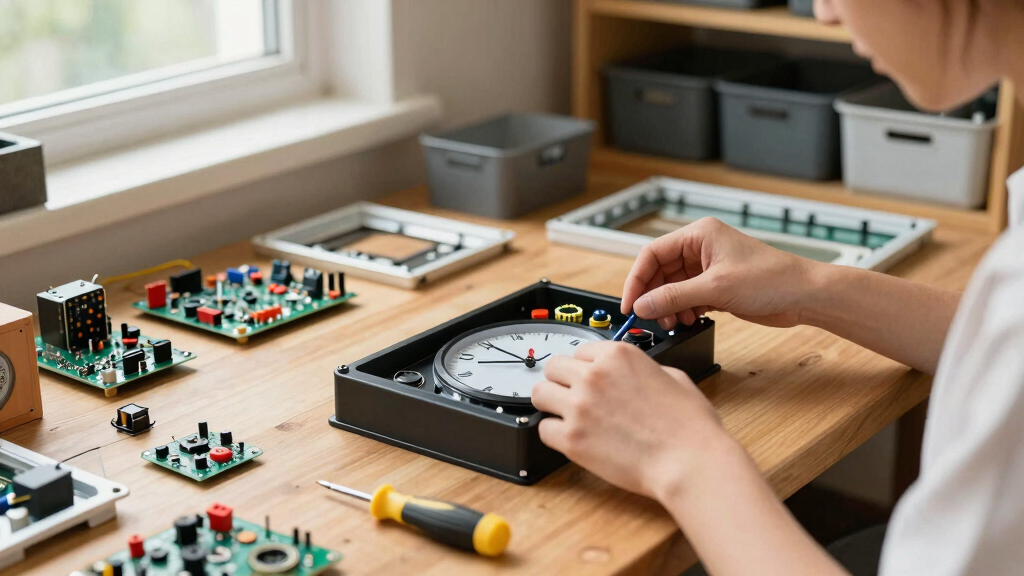
Having a dedicated workspace with good lighting and organization will speed up the process. Keep your tools handy: soldering iron, wire cutters, screwdriver, and your computer for coding.

DIY Microcontroller Projects for Hobbyists: The ultimate project-based guide to building real-world embedded applications in C and C++ programming
As an affiliate, we earn on qualifying purchases.
As an affiliate, we earn on qualifying purchases.
How to Customize Your Word Clock: Layouts, Features, and Looks
One of the most engaging aspects of building your own word clock is the ability to tailor it to your personal style and functional needs. Customizing the word layout allows you to choose how the time is displayed—whether in a traditional format, a different language, or a creative arrangement that fits your space. This flexibility means you can design a clock that not only tells time but also complements your decor and personality. When selecting a layout, consider how intuitive it is to read at a glance and whether it suits your aesthetic preferences.
Adding features like Wi-Fi control, alarms, or ambient light sensors can significantly enhance usability. These features enable remote adjustments, personalized alerts, or mood lighting—making your clock more than just a static display. Some builders go further, integrating touchscreens or voice commands, transforming the clock into a smart centerpiece. The key is to weigh the complexity against your skills and goals; more advanced customizations offer greater personalization but may require additional troubleshooting and learning.

EASYERA Smart Digital Wall Clock App Control, 16.5” Large RGB Clock
World’s First Smart Wall Clock: App control lets you manage time, lighting, workouts, and settings from your phone—bringing…
As an affiliate, we earn on qualifying purchases.
As an affiliate, we earn on qualifying purchases.
Recent Innovations Making DIY Word Clocks Smarter and Easier
Recent developments focus on connectivity and personalization. Many new kits include Wi-Fi or Bluetooth modules, allowing remote control via smartphone apps. This means you can change words or settings without opening the case, adding convenience and expanding functionality. This connectivity is crucial because it offers real-time updates, reduces the need for physical access, and enables integration with smart home ecosystems, making the clock more versatile and user-friendly.
Open-source communities contribute custom code repositories, which not only facilitate adding new features but also foster a collaborative environment for troubleshooting and innovation. The introduction of addressable RGB LEDs allows for vibrant, animated displays that can shift colors and effects dynamically, giving your clock a unique personality. Modular, plug-and-play kits simplify the assembly process, lowering barriers for newcomers and reducing errors. Eco-conscious materials and compact designs are also emerging, making these projects more sustainable and accessible. These innovations collectively mean you can craft a smarter, more adaptable clock with less technical hassle, broadening the appeal for both hobbyists and casual tinkerers alike.
What You Should Know Before Starting Your Build
Building a DIY word clock isn’t just about snapping parts together; it’s about understanding what’s involved. Besides the components, consider your skill level and patience. A simple kit may take just a few hours, but customizing features or designing your own layout could extend the project. Recognizing the scope helps set realistic expectations and prevents frustration.
Tools like a soldering iron, wire cutters, and a computer for programming are essential. Budget around $20 to $100 depending on the complexity and features you want. And remember, plenty of tutorials and community forums are ready to help you troubleshoot or get inspired. Being aware of potential challenges, such as wiring intricacies or software configuration, allows you to prepare accordingly and ensures a smoother build process.
Choosing the right kit is key—look for one that matches your skill and project goals. Whether you aim for a basic display or a smart, connected clock, there’s a kit suited for you, and understanding these considerations helps you make an informed decision.
Frequently Asked Questions
What skills do I need to build a DIY word clock?
Basic soldering, wiring, and some programming knowledge help, but many kits are designed for beginners. With patience, you can learn as you go, guided by tutorials and community support.
How long does it take to assemble a build kit?
Expect anywhere from 2-4 hours for a simple kit, up to a full day for more complex setups with extra features. Taking your time ensures a cleaner, more reliable build.
Can I customize the layout or add features later?
Yes, many kits and open-source projects support customization. You can change the words, add Wi-Fi control, or incorporate ambient sensors for a truly personalized clock.
What tools do I need for assembly?
A soldering iron, wire cutters, screwdriver, and a computer for programming are the basics. Some kits include everything needed, while others may require you to source specific tools.
Are pre-made enclosures available, or do I need to craft my own?
Both options exist. Some kits come with enclosures, or you can design and 3D print your own for a custom look that matches your decor.
Conclusion
Building your own word clock transforms a simple time-teller into a piece of art and engineering. With the right kit and a bit of patience, you create a functional, stylish display that’s all your own.
Imagine glancing at a sleek, illuminated phrase—your own creation—spelling out the exact time. That’s the magic of a DIY word clock. Ready to start? The tools, the design, the fun—are waiting for you to make your move.