
TL;DR
Listen free for 30 days with Audible
Thousands of audiobooks and originals — cancel anytime.
Start your free trialAs an affiliate, we earn on qualifying purchases.
Making a paper plate clock is a quick and inexpensive craft that helps children learn to read analog time. It combines creativity with practical skills, making it ideal for classroom or home use.
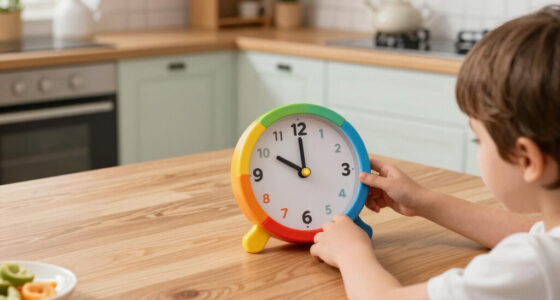
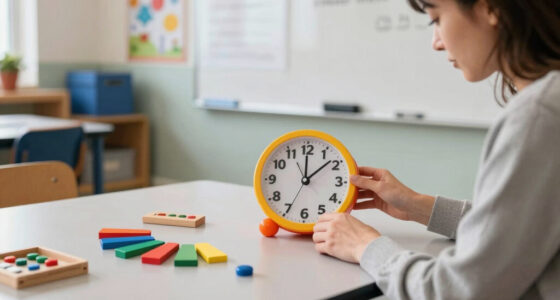
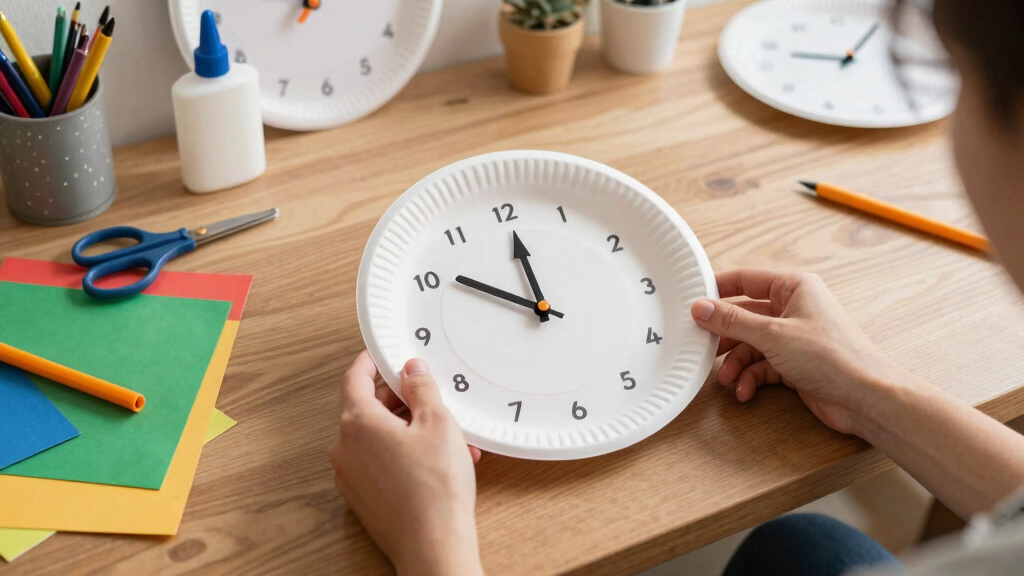
Imagine a classroom where kids eagerly assemble their own clocks, each one a burst of color and creativity. Making a paper plate clock isn’t just a fun craft — it’s a powerful way to teach children the fundamentals of telling time. This simple project blends art, motor skills, and math into one engaging activity that sticks.
If you’re looking for a way to turn a basic classroom lesson into a memorable hands-on experience, this guide walks you through every step. By the end, you’ll have a collection of cheerful, functional clocks and a classroom full of kids who understand what those moving hands really mean.
Making a paper clock combines creativity, fine motor skills, and time-telling practice in one activity.
Using durable materials like laminate and sturdy cardstock extends the life of the craft.
Involving children in decorating and assembling helps reinforce their understanding of how clocks work.
Comparison with digital clocks shows the value of hands-on analog learning for grasping time concepts.
This craft can be adapted for remote learning with printable templates and household supplies.
How to Make a Paper Plate Clock
Turn one simple plate into a movable teaching tool. This colorful craft blends art, fine motor practice, number sequencing, and analog time into a memorable activity for the classroom or home.
Your classroom clock kit
Choose sturdy materials when the clocks will be used repeatedly. A laminated plate and cardstock hands resist tearing, bending, and everyday spills.
Paper plate
Use a thick or laminated plate for a durable base that holds its shape.
Markers or paint
Bright, contrasting colors make numbers and time segments easier to recognize.
Scissors
Child-safe scissors work well; adult supervision is recommended for younger makers.
Brass fastener
A split pin holds both hands at the center while allowing them to rotate freely.
Sturdy cardstock
Cut one short hour hand and one longer minute hand from paper that will not flop.
Ruler + decorations
Use a ruler and pencil for spacing, then personalize with stickers or drawn patterns.
Six moves from plate to clock
Keep the number placement accurate and the center fastener loose enough to turn. Those two details make the finished craft a useful learning tool.
Draw 1–12
Write the numbers evenly around the rim. Start with 12, 3, 6, and 9, then fill the spaces between them.
Create the hands
Make the minute hand about ⅔ of the plate diameter and the hour hand about half. Keep them clearly different.
Decorate the face
Add color, patterns, stickers, or a theme. Personalization builds ownership and keeps young learners engaged.
Align the hands
Stack both hands at the plate’s center. Carefully make one small hole through the hands and plate.
Insert the fastener
Push the split pin through and secure it. Aim for gentle tension: stable, but loose enough to spin.
Add final touches
Mark quarter hours, color-code time segments, or label the hands to support guided practice.
Why hands-on time sticks
Moving physical hands connects an abstract idea—time—to visible positions and deliberate actions. Children become active participants instead of passive observers.
Paper clock vs. digital clock
Digital clocks are excellent for quick reading. Paper analog clocks are stronger when the goal is to reveal how hours, minutes, position, and elapsed time relate.
| Feature | Paper analog clock | Digital clock |
|---|---|---|
| Visual mechanics | ✓ Strong — moving hands make the structure of analog time visible. | ~ Limited — displays an exact number without showing hand movement. |
| Interaction | ✓ Active — children physically set and test different times. | ✗ Passive — children usually observe or read a fixed display. |
| Elapsed time | ✓ Visible — circular distance helps illustrate time passing. | ~ Abstract — often requires mental calculation between numbers. |
| Classroom cost | ✓ Very low — uses inexpensive, readily available craft supplies. | ✗ Higher — may require devices, power, and maintenance. |
| Durability | ~ Material-based — improves with lamination and sturdy cardstock. | ~ Device-based — durable screens can still break or lose power. |
From craft action to learning
Each making step produces a visible learning connection. Use the finished clock repeatedly for guided questions, games, and quick checks.
Make it at home
Send a printable number guide and invite families to substitute cardboard, recycled packaging, or a foam plate.
Analog + digital
Show a digital time, then ask learners to recreate it by moving the paper clock hands into position.
Explore mechanics
Discuss rotation, the center pivot, hand-length differences, and why the two hands move at different rates.
Four durability upgrades
A few small material choices turn a one-day craft into a reusable teaching aid for centers, partner work, or take-home practice.
Laminate first
Protect the plate before assembly to reduce tearing and guard against spills.
Use thick hands
Cardstock resists bending when children repeatedly move and reset the hands.
Tune the fastener
Secure it enough to prevent wobble, but leave room for smooth rotation.
Store it flat
Keep clocks in a tray or portfolio so the hands remain aligned between lessons.
What You Need to Make a Paper Plate Clock (Materials List)
The first step is gathering your supplies. For a sturdy, colorful clock, you’ll need:
- Paper plates — thick or laminated for durability
- Markers or paint — bright colors for decoration and numbers
- Scissors — adult supervision recommended
- Brass fasteners — split pins to make the hands rotate
- Paper or cardstock — for cutting out the clock hands
- Ruler and pencil — for measuring and marking
- Decorative items — stickers, glitter, or anything to personalize
Using quality materials makes the craft easier and the clock last longer. For example, laminated plates resist tearing, and sturdy cardstock keeps the hands from bending.
As an affiliate, we earn on qualifying purchases.
Step-by-Step: How to Assemble Your Paper Plate Clock in 6 Simple Moves
- Draw the numbers: Use your ruler and marker to neatly write numbers 1 through 12 around the edge of the plate, spacing them evenly. This step is crucial because accurate placement helps children understand the position of each hour on an actual clock, reinforcing spatial relationships and proportional reasoning.
- Create the hands: Cut out two strips from cardstock — one longer for the minute hand, one shorter for the hour hand. Tip: Make the minute hand about two-thirds the length of the diameter, and the hour hand about half. These proportions matter because they visually demonstrate the difference between hours and minutes, helping kids grasp the concept of time measurement and the significance of the hand lengths.
- Decorate the clock face: Let kids add stickers, draw designs, or color in the numbers to make their clock unique. Personalization fosters ownership and engagement, which can boost motivation and retention of the learning process. When children see their own creative touches, they are more likely to pay attention to the details of how the clock functions.
- Attach the hands: Place the hour and minute hands on the center of the plate. Poke a small hole through the middle of each hand and the plate. This step is vital because it allows the hands to rotate freely, mimicking real clocks. Properly aligned and secured, the hands can be manipulated to demonstrate different times, reinforcing the connection between the physical movement and the concept of time.
- Insert the fastener: Push the brass fastener through the holes, securing the hands but allowing them to spin freely. The tradeoff here involves balancing tightness: too tight and the hands won’t move smoothly; too loose and they may slip out of place. Achieving the right tension helps children practice setting specific times and observing how the hands move in relation to each other.
- Final touches: Add any extra decorations, labels for quarter hours, or fun themes to make it more engaging. These finishing details can serve as visual cues that support learning, such as marking quarter hours to help children recognize 15-minute intervals, which enhances their understanding of how to read and interpret the clock more fluently.
This process takes about 15-20 minutes, perfect for a classroom session or a weekend craft session at home.
analog clock teaching tools for children
As an affiliate, we earn on qualifying purchases.
As an affiliate, we earn on qualifying purchases.
Why Making a Paper Plate Clock Boosts Learning and Fun
Learning to tell time becomes more meaningful when kids handle the clock themselves. When they draw the numbers, cut out the hands, and see the hands move, they connect physical actions to abstract concepts. It turns a dry lesson into a lively, memorable experience.
Plus, kids develop fine motor skills, patience, and a sense of achievement—especially when their clock actually works! These skills are foundational for more complex concepts in math and problem-solving, and the confidence gained from successful hands-on activities encourages further exploration.
For example, a first-grader who struggled with reading clocks suddenly gleams with pride after correctly setting the time during class. It’s this hands-on approach that makes the lesson stick, because children are not just passive recipients of information—they become active participants, which significantly enhances understanding and retention.
DIY classroom clock craft supplies
As an affiliate, we earn on qualifying purchases.
As an affiliate, we earn on qualifying purchases.
Comparison Table: Paper Clocks vs. Digital Clocks for Teaching Time
| Feature | Paper Clock | Digital Clock |
|---|---|---|
| Visual Clarity | Great for understanding analog time, showing how the hands move; it helps children visualize the mechanics of a clock, which is essential for grasping how time is represented physically. | Shows exact time in numerical form, which is useful for quick reference but less intuitive for understanding the movement of clock hands and the concept of elapsed time. |
| Interaction | Kids can manipulate the hands to practice setting different times, fostering active learning and kinesthetic understanding of how clocks work. | Passive; kids observe or read the time but cannot physically manipulate the display, which may limit their grasp of the mechanics behind time telling. |
| Cost | Very inexpensive; mostly craft supplies, making it accessible for most classrooms and families. | Usually requires a device or purchase, which can be more expensive and less feasible for large groups or resource-limited settings. |
| Durability | Depends on materials used; laminated or sturdy cardstock can withstand handling and repeated use, emphasizing the importance of material choice for long-term educational tools. | Depends on the quality of the device; electronic screens are durable but can break, and digital displays require power and maintenance, which may hinder long-term use in some environments. |
children's paper plate clock template
As an affiliate, we earn on qualifying purchases.
As an affiliate, we earn on qualifying purchases.
Tips to Make Your Paper Clock Last Longer
Here are quick tips to boost your clock’s durability:
- Laminate the paper plate before assembly for extra strength and spill protection, ensuring it withstands handling over time and accidental spills that could otherwise damage the surface.
- Use sturdy cardstock for the hands—thicker paper resists bending and tearing, which is crucial because the hands are manipulated frequently during lessons, and durability ensures consistent functionality.
- Secure the fastener tightly—loose hands won’t spin smoothly, and a loose fastener can cause the hands to wobble or fall off, disrupting the learning process.
- Handle the clock gently, especially during lessons or display, to prevent tearing or misalignment. Proper handling also reinforces the importance of care and respect for learning tools, extending their lifespan.
For example, a teacher laminated her class’s clocks, and months later, they still look fresh and function perfectly during daily lessons. This investment in durability pays off by providing a reliable teaching aid over many uses.
How to Make This Activity Fit Remote or Hybrid Learning
Making a paper clock at home or in a remote setting is easy. Provide printable templates and a list of household materials—like old gift cards or sturdy paper for hands. Children can cut, decorate, and assemble their clocks independently or with minimal supervision. This flexibility allows children to engage with the activity regardless of their learning environment, fostering independence and confidence.
For instance, during a virtual lesson, you can share a printable clock template online. Kids print, color, and cut at home, then show their finished clocks during class. This method maintains the tactile, manipulative aspect of the activity, which is essential for kinesthetic learners and helps bridge the gap between in-person and remote instruction.
Frequently Asked Questions
What age group is best for this craft?
This activity works well for children aged 5 to 10. Younger kids might need help with cutting or handling the fastener, while older children can do most steps independently.
How can I make it more educational?
Include labels for quarter hours, practice setting different times, or incorporate story-based scenarios like ‘What time is it?’ games to deepen understanding.
What if my kids want a more durable clock?
Laminate the paper plates and use thicker cardstock for the hands. Reinforcing the fastener and handling the clock gently also helps it last longer through repeated use.
Can I do this activity with recycled materials?
Absolutely! Use cardboard instead of paper plates or repurpose old disks, and recycled paper for hands. It’s eco-friendly and budget-friendly.
How do I teach children to read the clock after making it?
Use the clock to show how the hour and minute hands move. Practice setting the clock to different times and reading them aloud to reinforce learning.
Conclusion
Creating a paper plate clock isn’t just a craft — it’s a small step toward big understanding. Kids learn best when they do, see, and touch. So next time you need a quick, meaningful activity, grab a paper plate and start turning it into a fun, educational clock.
Imagine a classroom where every child holds a colorful clock, each one a tiny masterpiece. That’s where the real learning begins — with a simple piece of paper, a little glue, and a lot of imagination.
NFL season / tailgating Picks
team gear
As an affiliate, we earn on qualifying purchases.