TL;DR

Get decor and gifts delivered free with Prime
- Fast, free delivery on millions of items
- Prime Video, Amazon Music and more included
- Member-only deals all year
Worksheets reinforce recognizing time, while hands-on clocks help kids grasp how the clock works. Combining both methods leads to better retention and understanding, especially with recent tech tools enhancing learning.
Imagine a classroom where kids not only memorize what 3:45 looks like but actually understand why the hands move the way they do. That’s the secret behind effective time-telling lessons. Today, we’ll explore the two main tools: worksheets and hands-on clocks—and what really makes them stick in young minds.
If you’ve ever watched a child struggle to understand how the minute hand relates to the hour, you know that learning isn’t just about memorization. It’s about feeling, seeing, and doing. Let’s uncover which methods foster genuine understanding and how to combine them for maximum impact.
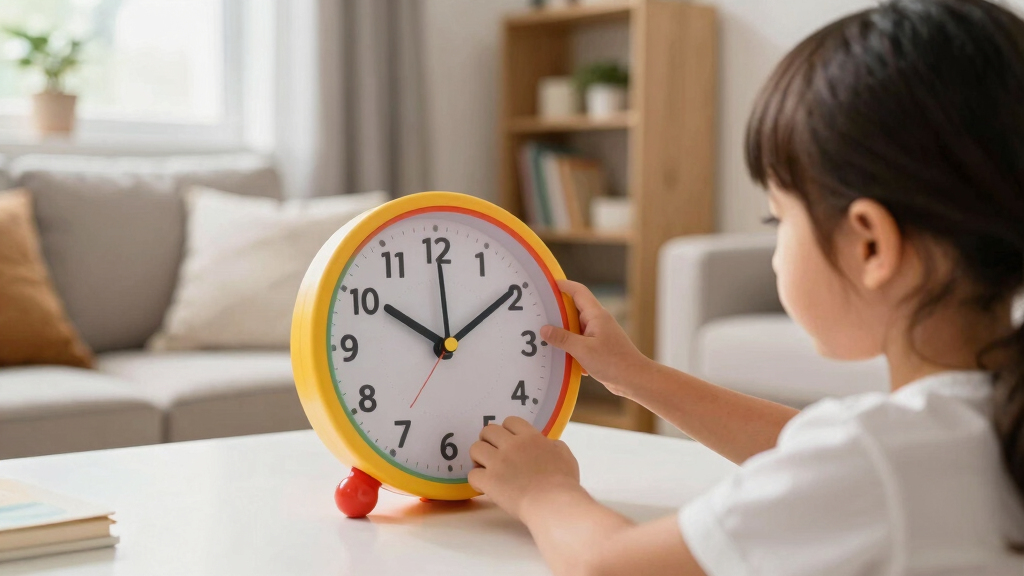
Hands-on clocks turn abstract concepts into tangible experiences, building deeper understanding.
Worksheets reinforce pattern recognition and quick assessment, perfect for practice after grasping basics.
Combining both methods addresses multiple learning styles, boosting retention in young learners.
Use digital tools and games to make learning interactive and fun, enhancing engagement.
Start with physical manipulation, then reinforce with worksheets and tech for best results.
Telling Time Worksheets vs Hands-On Clocks: What Actually Sticks
TL;DR: Worksheets reinforce recognizing time, while hands-on clocks help kids grasp how the clock works. The strongest retention comes from combining both: first touch and manipulate the clock, then practice the same idea through worksheets, games, and digital tools.
Recognition is not the same as understanding.
A child may memorize what 3:45 looks like without understanding why the minute hand points to 9 or why the hour hand is nearly at 4. Hands-on clocks build the mechanism; worksheets strengthen recall.
Make time tangible
Moving the minute hand from 12 to 3 turns “quarter past” into a visible and physical change. Kids feel the relationship between motion, minutes, and hour position.
Reinforce patterns
Clock faces, matching tasks, and elapsed-time puzzles build fluency once the child has already seen how the clock works in motion.
Add adaptive play
Online simulations and games blend visual practice with interaction, giving instant feedback while keeping attention high.
The sticky lesson flow: move it, name it, mark it.
The most durable approach uses multiple learning pathways in one session: kinesthetic first, verbal explanation second, written practice third, and playful review at the end.
Worksheets are useful. Clocks are foundational.
Use worksheets as a diagnostic and fluency tool. Use hands-on clocks when a child is still building the mental model of how hours and minutes connect.
| Feature | Worksheets | Hands-On Clocks | Best Use |
|---|---|---|---|
| Engagement | ~ Can become repetitive if overused. | ✓ Highly interactive for young learners. | Start with movement, then add short written bursts. |
| Conceptual Understanding | ~ Good for recognition and pattern practice. | ✓ Builds understanding of how the clock functions. | Use a clock when the minute-hour relationship is confusing. |
| Motor and Spatial Skills | ✗ Limited physical development. | ✓ Supports fine motor control and spatial reasoning. | Ideal for ages 5-8 and early analog-clock lessons. |
| Assessment | ✓ Easy to grade with answer keys. | ✓ Real-time formative feedback while students adjust hands. | Pair both to spot and correct misconceptions quickly. |
| Retention | ~ Stronger after the basics are understood. | ✓ Strong for early understanding through tactile learning. | Blend both for the most durable learning path. |
Different tools strengthen different parts of the skill.
The chart below translates the research themes into classroom impact: hands-on clocks lead for mechanics and retention; worksheets lead for efficient practice and assessment; tech adds motivation and feedback.
The strongest marker sits on “hybrid.”
Recent classroom practice favors integration: begin with physical manipulation, reinforce with worksheets, then vary the practice through digital simulations or games.
Mix methods with intention, not just variety.
The goal is not to choose one tool forever. The goal is to use each tool at the moment where it does the most cognitive work.
When to reach for a clock
Use a hands-on clock when learners struggle with why the hour hand drifts, why 30 minutes lands on the 6, or why quarter past and quarter to feel reversed.
- Ask children to move the minute hand and watch the hour hand shift.
- Compare nearby times such as 2:30, 2:45, and 3:00.
- Have students explain the hand positions before writing answers.
When to reach for worksheets
Use worksheets after the core idea is visible and physical. They are excellent for quick checks, repeated practice, and spotting precise misconceptions.
- Match analog clocks to digital times for fluency.
- Target confusing pairs like quarter past and quarter to.
- Use answer review as a mini-conversation, not just a score.
From movement to mastery.
A sticky time-telling lesson leaves a trace: the child touches the concept, says the concept, translates the concept, and then recognizes it quickly later.
Common questions from parents and teachers.
The simple rule: teach the mechanism with a clock, build fluency with worksheets, and keep motivation alive with games or simulations.
Which method works best for very young children?
Hands-on clocks are especially effective for ages 5-8 because they let children see and feel how the clock works before abstract practice begins.
Can digital tools replace physical clocks?
Digital tools are strong supplements, but real clock hands still provide tactile feedback that helps early learners understand movement and position.
How do I keep learning motivating?
Alternate short clock activities, targeted worksheets, puzzles, and simulations so practice feels active without losing structure.
Why Hands-On Clocks Make Time Feel Real
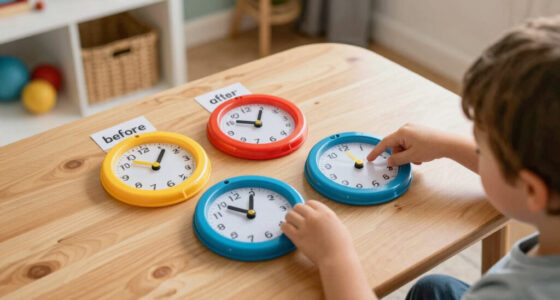
Hands-on clocks turn abstract numbers into something tangible. When a child manipulates the clock’s hands—moving the minute hand from 12 to 3—they see, hear, and feel the motion. This physical action cements the concept far better than just looking at a picture.
Imagine a 6-year-old setting the clock to 2:30, watching the minute hand land on the 6 and the hour hand drift between 2 and 3. That moment of physical interaction helps the brain connect the dots—this is how the clock’s parts work together.
Research from Alphabet Clock shows that tactile learning, especially in early grades, boosts retention of how clock hands move and why. Kids aren’t just recognizing the time—they understand it.
**Practical Takeaway:** Incorporate regular hands-on clock activities where children physically move the hands to different times. Ask questions like, “What do you notice about the position of the hands when it’s 3:00 versus 3:15?” This encourages active observation and deepens understanding, making the concept more intuitive and less rote.
As an affiliate, we earn on qualifying purchases.
Why Telling Time Worksheets Are Still Useful
Worksheets aren’t just busywork—they’re quick, efficient tools for practice and assessment. They help kids recognize digital and analog times, solve puzzles, and reinforce patterns.
Picture a child completing a worksheet with clocks showing 4:15, 7:45, and 12:00. Repeated exposure builds familiarity. Plus, worksheets offer instant feedback—answers are right there, so kids see what they got right or wrong.
However, their true value extends beyond mere recognition. Well-designed worksheets can challenge students to differentiate between similar times, identify common misconceptions, and develop critical thinking about how times are represented in different formats. This depth helps prevent rote memorization and encourages a more flexible understanding. When used strategically, worksheets can highlight specific areas where a child may be confused, allowing targeted intervention.
According to Alphabet Clock, worksheets are especially helpful once children grasp the basics. They serve as a bridge from understanding to mastery, especially when combined with other activities.
**Practical Takeaway:** Use worksheets as a diagnostic tool to identify which specific times or concepts your child struggles with. For example, if they consistently confuse quarter past and quarter to, focus practice on those formats. Pair worksheet tasks with quick discussions or mini-games to make practice more engaging and reinforce learning through immediate application.
telling time worksheets for children
As an affiliate, we earn on qualifying purchases.
As an affiliate, we earn on qualifying purchases.
The Power of Combining Worksheets and Hands-On Clocks
Using both tools taps into different learning styles—visual, kinesthetic, and logical. This combo addresses various needs, making learning stick better than relying on one method alone.
Start with a hands-on clock activity. Let kids experiment: set the clock to different times, see how the hands move, and discuss what they observe. Then, reinforce with worksheets—matching times, filling in the clock faces, or solving puzzles.
For example, a child might use a clock to set 3:30, then complete a worksheet that asks, “What time is shown?” Seeing the same time in different formats deepens understanding. The physical and visual cues work together, making the concept intuitive.
Recent studies highlight that this hybrid approach boosts retention and comprehension, especially in early learners. By engaging multiple senses and cognitive pathways, children develop a more comprehensive and durable understanding of how to tell time. This strategy also allows educators to tailor instruction, addressing individual learning preferences and misconceptions more effectively.
**Practical Takeaway:** Design lessons that alternate between hands-on activities and worksheet exercises within the same session. For instance, after physically setting a clock, immediately have children record the time on a worksheet. This immediate transfer from tactile to written reinforces memory and helps identify misconceptions quickly.
interactive digital clock learning toy
As an affiliate, we earn on qualifying purchases.
As an affiliate, we earn on qualifying purchases.
A Side-by-Side Look at Effectiveness
| Feature | Worksheets | Hands-On Clocks |
|---|---|---|
| Engagement | Can become repetitive, especially if overused | Highly interactive and fun, especially for young kids |
| Conceptual Understanding | Good for recognition and pattern practice | Builds deep understanding of how the clock functions |
| Motor Skills | Limited | Develops fine motor skills and spatial reasoning |
| Assessment | Easy to grade, instant feedback with answer keys | Real-time feedback through manipulation |
As an affiliate, we earn on qualifying purchases.
How to Mix Worksheets and Clocks for Maximum Impact
- Start with a hands-on clock activity. Let kids manipulate the clock, setting different times and describing what they see.
- Follow up with targeted worksheets that reinforce the same times or challenge them with new ones.
- Use digital and printable resources—like online clock simulations—to add variety and keep engagement high.
- Encourage kids to explain what they’re doing. “I’m moving the minute hand to 12, so it’s exactly on the hour,” helps solidify understanding.
- Repeat with different times, gradually increasing complexity—quarter hours, elapsed time, and mixed formats.
Why Tech Tools and Games Boost Learning
Educational apps and online clock simulations combine the best of both worlds. Kids can manipulate virtual clocks, solve puzzles, and play games that make learning to tell time feel like fun rather than work.
Imagine a child racing against the clock in a game, setting times correctly to unlock new levels. These tools adapt to different skill levels, providing instant feedback and keeping motivation high.
According to Alphabet Clock, integrating tech tools boosts engagement and supports kinesthetic and visual learning styles, especially in a digital age.
Frequently Asked Questions
Which method works best for very young children?
Hands-on clocks are especially effective for ages 5-8, helping them see and feel how the clock works before moving on to worksheets for reinforcement.Can digital tools replace physical clocks?
While digital tools are great for practice and variety, the tactile experience of moving real clock hands remains crucial for developing deep understanding at early ages.How do I keep my child motivated during learning?
Incorporate games, interactive simulations, and hands-on activities—mixing fun with practice keeps kids engaged and eager to learn more.Are there good resources for free practice?
Yes, many printable worksheets and online clock simulations are available for free, making it easy to practice anytime and anywhere.When should I introduce advanced time concepts?
Start with basic analog and digital times around ages 5-6, then gradually introduce elapsed time and more complex formats as their skills grow.Conclusion
Teaching kids to tell time isn’t about choosing one method over the other. It’s about blending tactile, visual, and digital tools to create a rich, engaging learning experience. The magic happens when hands-on clocks build intuition, and worksheets solidify knowledge.
Imagine a child confidently setting the clock, then confidently reading the time on a worksheet. That’s real understanding—lasting, meaningful, and fun to watch grow.
Halloween Picks
halloween
As an affiliate, we earn on qualifying purchases.